
- Neo Biotech
- Oct 23, 2024
- 4 min read


In the previous post, we discussed the challenges and limitations of conventional implant protocols, particularly their inability to provide optimal fixation across diverse bone densities. Now, it’s time to explore the CMI fixation, an advanced drilling and placement approach that aims to transform how we achieve stability in implant placement. This post will dive into the specifics of the CMI protocol, examining how it maximizes bone-to-implant contact (BIC), and reduces stress distribution.
Adapting to Different Bone Densities
Usually, bone density classifications like D1, D2, D3, and D4 refer to homogeneous bone types, but actual implant sites often contain a mix of soft and hard bone. To achieve optimal fixation and stability, it’s crucial to adapt the approach based on these variations.

The Importance of Comprehensive Fixation
The goal is clear: we need secure fixation from all parts of the implant and across all bone densities. Achieving this is crucial for ensuring optimal stability. How can we accomplish this? This is where the CMI fixation concept comes into play. It offers a unique approach to implant placement, providing comprehensive fixation regardless of bone density.


Achieving Maximum Fixation: Understanding the CMI Fixation
We aim for secure fixation from the Coronal, Middle, and apical(Inferior cortical wall) sections, not just from the tip of the threads. This approach maximizes the bone-to-implant contact rate (BIC rate), ensuring stability while leaving just enough microspace to enhance osseointegration. To achieve this, every part of the implant must engage with the surrounding bone, adapting to the various densities that may be present.
The CMI concept focuses on achieving fixation from different parts of the implant:
C-Fixation: Fixation from the coronal part.
M-Fixation: Fixation from the middle part.
I-Fixation: Fixation from the apical part, especially the inferior cortical wall of the sinus.

The combination of these fixations ensures a comprehensive approach to fixation, adapting to various bone conditions encountered during implant placement. By assessing the bone density of the C, M, and I areas individually, various fixation types can be identified. The types of fixation are classified into CMI, CM, MI, C, M, and I fixations, depending on which part of the implant obtains fixation.


Understanding CMI Drilling Protocol
Once the bone density at various parts is clearly identified, it’s time to prepare for osteotomy. The protocol is straightforward: use passive placement for hard bone and active placement for soft bone.

Passive Placement for Hard Bone
Hard bone typically offers stronger fixation, but it's important to minimize unnecessary trauma. Therefore, implants should be placed passively, respecting the physiological and biological conditions of the bone. Neobiotech’s drills are slightly narrower than those of other brands, specifically designed for the unique CMI fixation. Full-size drilling is followed by tapping—cortical tapping for hard bone in the C area, and full tapping if hard bone is positioned in the MI area.

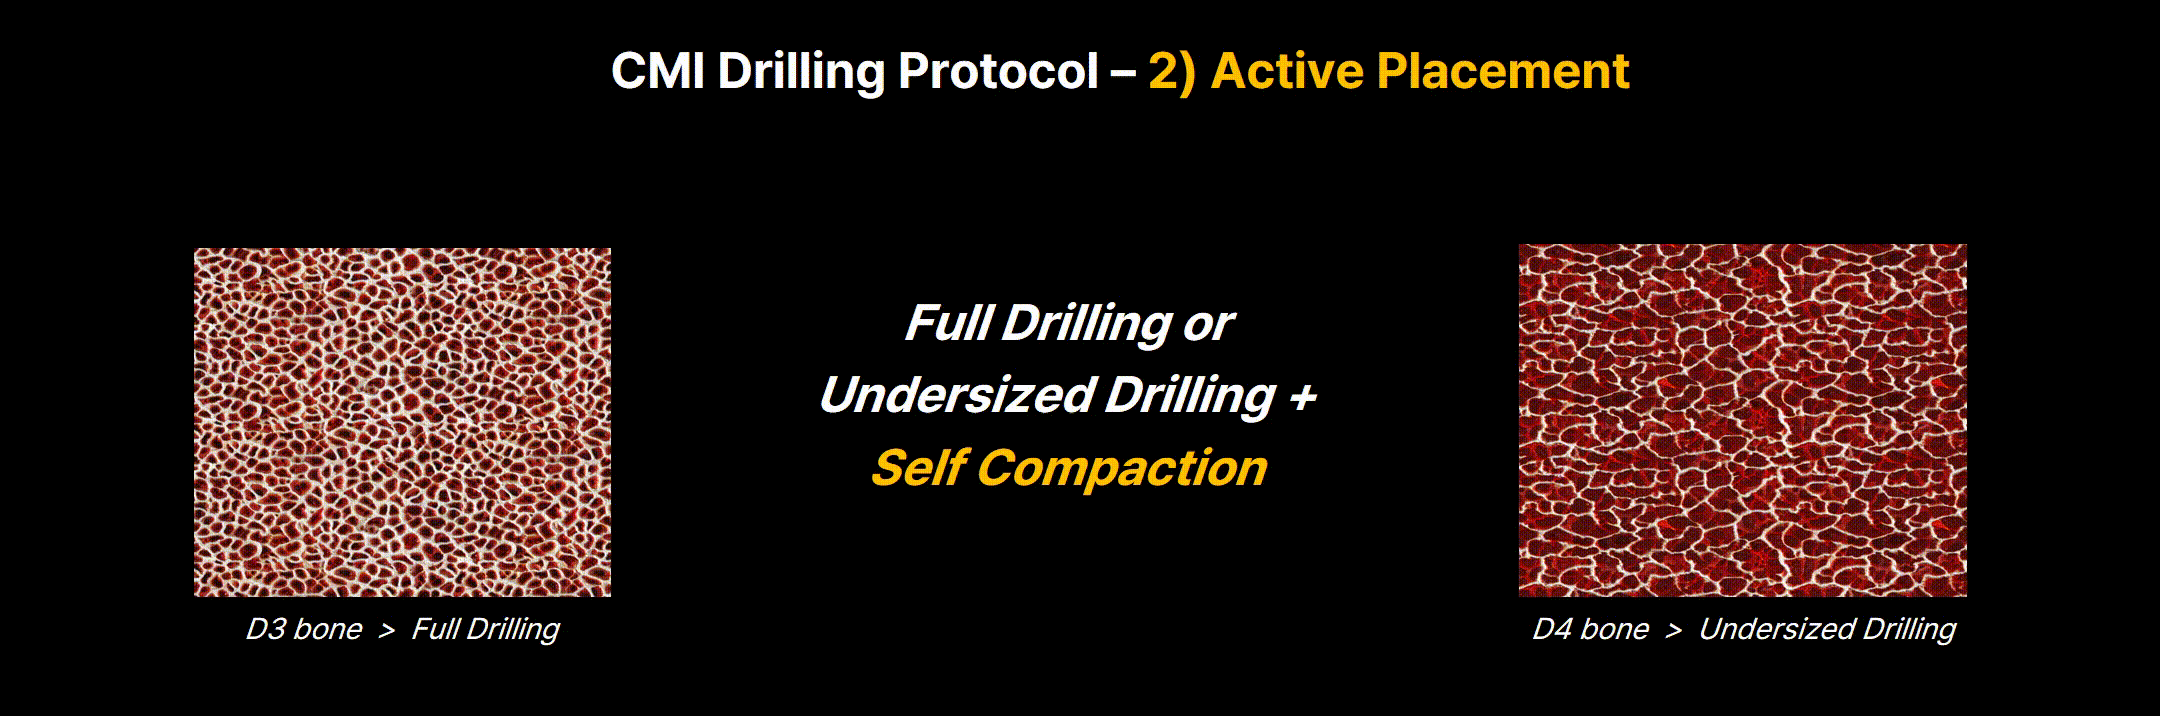
Active Placement for Soft Bone
The CMI implant is particularly suited for self-compaction, effectively condensing soft bone and achieving additional fixation with its unique taper design, specialized threads, and strong apex. This design allows the implant to be placed actively in soft bone, providing secure stability even in less dense areas. In the case of D3 bone, a slightly narrower final drill is used, while for the weakest D4 bone, undersized drilling is necessary.

CMI Drilling Protocol: Combining Passive and Active Placement
The CMI drilling protocol integrates both passive and active placements. In summary, passive placement is ideal for hard bone, minimizing trauma while maximizing the bone-to-implant contact (BIC) ratio. Active placement is used for soft bone, utilizing self-compaction and self-tapping to achieve enhanced fixation. This combination ensures the highest level of stability and effectiveness in implant procedures.

The Advantages of the CMI Drilling Protocol
Comparison of BIC Ratio Across Conventional Protocol
The bone-to-implant contact (BIC) ratio is a critical factor in ensuring successful implant fixation. When comparing conventional protocols with the CMI drilling protocol, a significant difference can be observed. In conventional methods, using countersink in hard bone achieves around 49% BIC. In contrast, the CMI drilling protocol with tapping in hard bone scenarios achieves approximately 62% BIC. This demonstrates how the CMI protocol maximizes contact between the implant and bone, significantly enhancing stability.

Comparison of BIC Ratio Across Different Implant Systems
The effectiveness of the CMI protocol becomes even clearer when compared to other implant systems. For instance, Neobiotech implants achieve nearly 62% BIC, while a competing ‘B’ system with final drilling only reaches about 38%. These results highlight the superior performance of the CMI drilling protocol in achieving optimal fixation.

Stress Distribution Comparison
Stress distribution is also a key consideration. With crestal widening, stress tends to concentrate at the tips of the threads, which can negatively impact fixation. However, with the CMI protocol’s tapping method, stress is evenly distributed across the entire thread surface and the body of the implant, providing a more balanced and secure fixation.

Summary & Next Step
When fixation comes from all CMI areas—coronal, middle, and apical(inferior)—it represents the ideal scenario for AnyTime Loading. This comprehensive fixation provides the primary stability needed for immediate loading. However, if fixation is limited to the MI area alone and primary stability is only around 40-45N/cm, immediate loading might not be advisable. In AnyTime Loading, having precise data on where fixation occurs is crucial to making the right clinical decisions.
With a clear understanding of the CMI fixation concept, the next step is to explore its effectiveness in real-world clinical settings. How can this concept be best applied in practice? Does it truly provide the optimal fixation required? These questions will be addressed in the next post, where we will delve into real-life applications of the CMI fixation concept and explore how it impacts patient outcomes.


